Use Campaign Templates to create the Campaign content and apply it the Campaign process order to promote new products/services, send seasonal updates, make announcements and maintain relations with your market groups. Using Filters user can group potential Contacts, Accounts, Leads, etc. and create several Campaigns per specific group. Export statistics from each campaign and improve the next one.
- Campaigns can be monitored through the Dashboard and Process Dashboard.
- Repetitive Campaigns processes can be created, re-used and monitored from Process Templates.
- There is a Process Timesheet specifically for Processes, where you can see Tasks per each Process of type Campaign in one picture.
- Notify yourselves or your team of a specific action upon a process of type Campaign with Notification Scenarios by selecting the Process category you use for your Campaigns.
Create a Campaign Template
In order to access Campaign Templates, go to Modules Menu Icon > Business Automation > Campaign Templates. A new Unit Action Tab appears with the name Campaign Templates in the Active Units Bar.
- Start with creating a new Campaign Template by clicking on the sign in the Unit Title Bar. A new form appears.
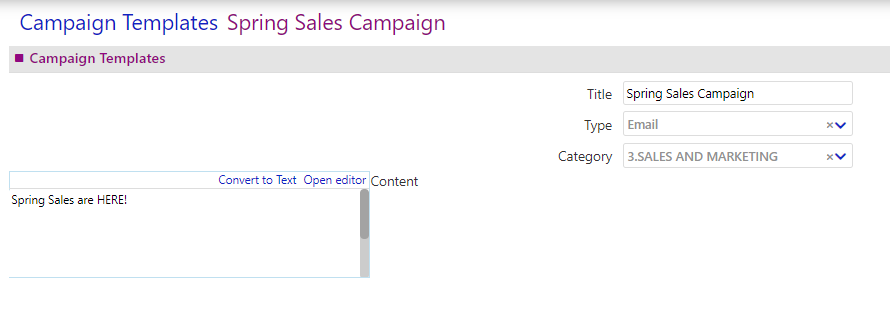
- Put the Campaign Template Title, its Type (Email, SMS, Letter), the Campaign Template Category and then write your Content or Open editor to write content in a Rich text editor.
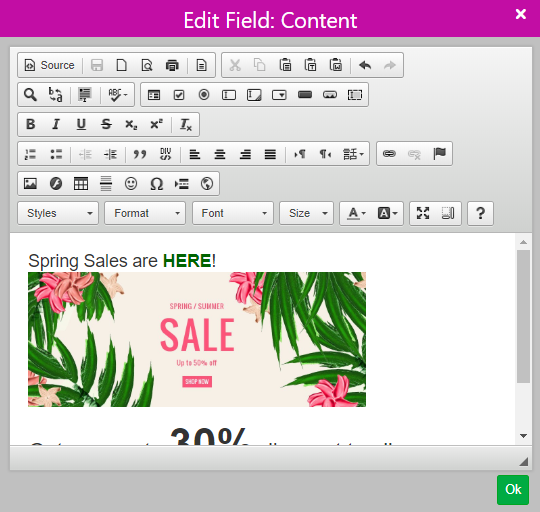
- Provided that you clicked on Open editor button, a pop-up window appears. Use all features that the HTML editor has to offer. Click Ok to save it.
- Convert to Text button will ask you to transform your customized format into simple text.
- Press View in editor to see again the Campaign Template content.
- Click on the left arrow to go back in Campaign Templates or proceed on Save buttons.
- Put the Campaign Template Title, its Type (Email, SMS, Letter), the Campaign Template Category and then write your Content or Open editor to write content in a Rich text editor.
- Finally, click on Save to save the Campaign Template, Save and New to save it and then create a new one, or Cancel to exit the Campaign Template creation form.
Manage Campaign Templates
In order to access Campaign Templates, go to:
- Modules Menu Icon > Business Automation > Campaign Templates. A new Unit Action Tab appears with the name Campaign Templates in the Active Units Bar.
- All Campaign Templates are displayed in a ListView. Navigate to other views, sort or filter the Campaign Templates in order to find the one you wish.
- Check Data Management options for more information about all these.
- Check Data Management options for more information about all these.
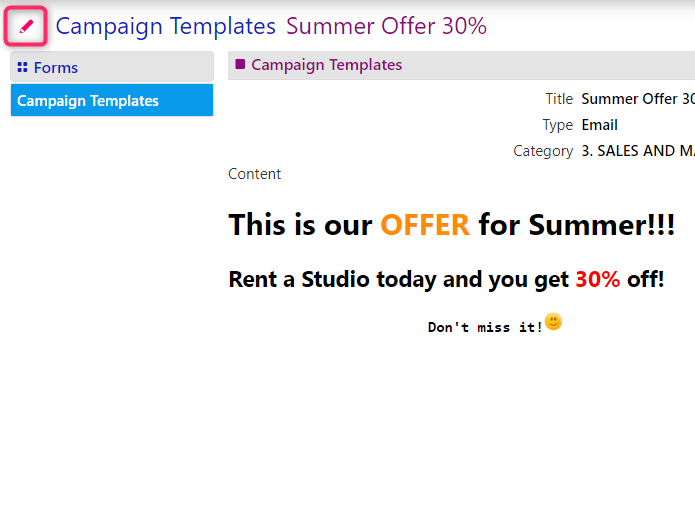
- Click on Campaign Template from the list to enter and view or edit it. Click on the pencil button to edit the Campaign Template.
- Then, you can edit any field as you have done while Creating a Campaign Template.
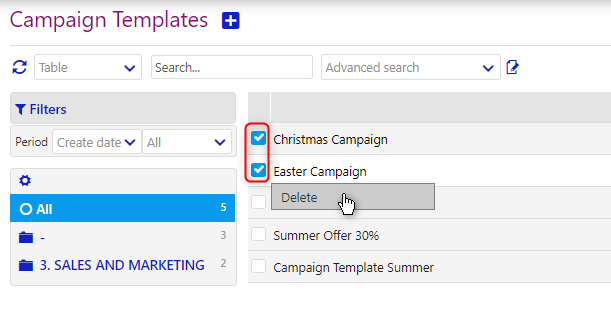
- Check multiple Campaign Templates from the list in order to Delete.
Create a Campaign
- In order to access Campaigns, go to Modules Menu Icon > Customer Relations > Campaigns. A new Unit Action Tab appears with the name Campaigns in the Active Units Bar.
- Create a Campaign by clicking on the sign in the Unit Title Bar. A new form appears.
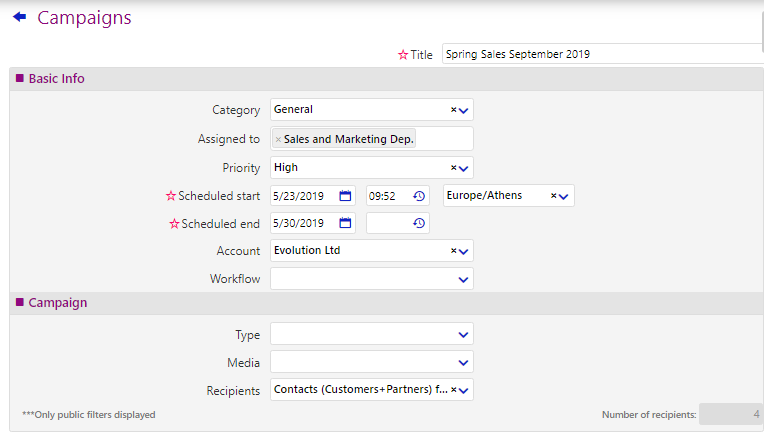
- Fill in the Title of the Process and the Basic Info of the Process of type Campaign.
- Category: Search for a Process Category and select it or add a new one. See how to add Categories in Data Management.
- Assigned to: Click on Assigned to field in order to see Comidor Users and Groups. You can assign this Campaign in as many as people or groups you wish. This means that people you will select here, are those who will be responsible upon Campaign tracking and completion.
- Select the Priority of the Campaign between Low, Normal, High or Top.
- Set Scheduled Start and End Dates and Times of the Campaign.
- Then, connect this Campaign with a related Account and Workflow.
- Complete Campaign details, such as:
- Type: Search for a Campaign Type and select it or add a new one. See how to add Categories in Data Management.
- Media: Search for a Campaign Media channels and select it or add a new one.
- Recipients: Select one of the public Filters you have saved from Contacts, Accounts, Leads lists and see the Number of recipients.
- Complete Campaign Description.
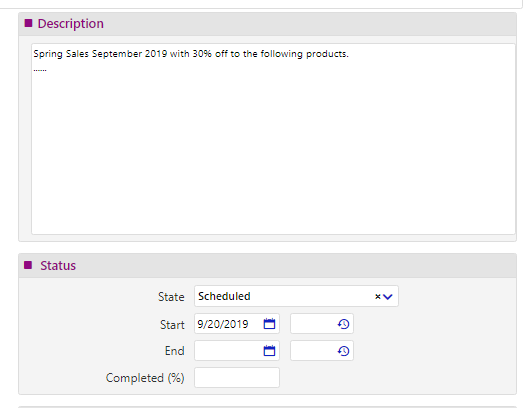
- Execution field will be later filled when the process will start. In case, that the process has already started, make sure you will complete these fields as well.
- Start and End Dates & Times are the execution actual start and end dates and times. They will be displayed when the Campaign starts and is completed.
- The state will be stated automatically as Created when the Campaign will be created. You may change this later as Scheduled, Running, Running, Completed, Canceled, Paused or Failed. Campaign State will be changed to Running automatically, provided that you had check Start automatically field at the bottom right.
- Completed (%) is the percentage of Campaign completion and should be added and managed manually by the Campaign holders.
- You may want to add Location Details, such us Country, Address and City information.
- Furthermore, fill in the Additional Info:
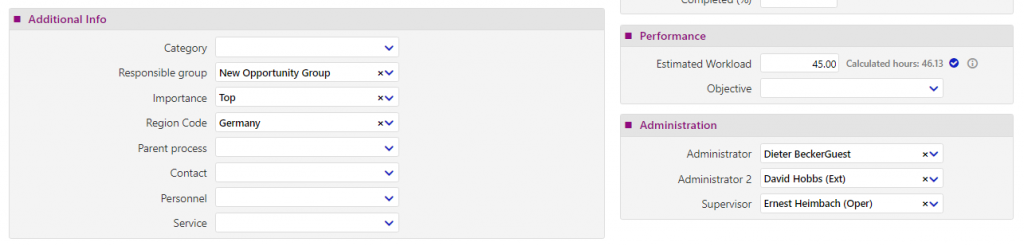
- Category: Search for a Process Category and select it or add a new one. See how to add Categories in Data Management.
- Responsible Group: Select the group who will have the accountability of this Campaign.
- Select the Importance (Normal, High, Top) of the Campaign.
- When the Region code is set up in Regional Settings, suggested calculated hours give the timeframe of the working hours between scheduled start and end, excluding public holidays, etc.
- Every Campaign may have its core relations. So, you can Link this Campaign with a related Contact, Parent Process, Personnel, and a Service. Type some related letters to find an entity.
- Estimated workload, is the actual Campaign duration, in hours. You can also add as an Objective an indicator, already created in KPI’s, in order to monitor the campaign.
- Set users that will be Administrators and Process’s Supervisor. Practically, this means that these users will have access on this Campaign, even if they are not added in the Basic Info above.
- Send notification to: Fill in Comidor Users and Groups, you wish to receive a notification when someone commented on this Campaign.
- Click on the checkbox, whether you wish to inform the Process Administrator upon task completion.
- Additional access: People or/and Groups that should have access on this Campaign, without being necessary to act upon it.
- Change rights: People or/and Groups that could edit this Campaign details in the future. “Everyone” is chosen by default. This means that Everyone who has access to this Campaign will have the right to modify it.
- Click on the check box to set this Campaign start running automatically.
- Finally, click on Save to save the process, on Save and notify when you need to save but also send a Notification message to appropriate people or cancel to cancel the procedure.
Create a Campaign from a Campaign Template
In order to access Campaigns, go to Modules Menu Icon > Customer Relations > Campaigns. A new Unit Action Tab appears with the name Campaigns in the Active Units Bar.
- Create a Campaign by clicking on the ‘+’ sign in the Unit Title Bar. A new form appears.
- Click on Create from Template on the side right to select a template and create a new Campaign.
- A pop-up window appears. You can Select an existing process as a template from the list, change the new Campaign Title, adjust the Scheduled start date, match an Account from the list, write a Description and choose whether to Include sub-processes and/or tasks in the new Campaign. Click on Create Process to save it.
Edit and Monitor a Campaign
In order to access Campaigns, go to Modules Menu Icon > Customer Relations > Campaigns. A new Unit Action Tab appears with the name Campaigns in the Active Units Bar.
Manage a Campaign
- Click on a Campaign from the list to enter it. Click on the left arrow to go back in the list and in the pencil button to edit the Campaign
- Edit button only appears to people that are added in the Change Rights field of a process.
- Click on a Campaign from the list to enter it. Click on the left arrow to go back in the list and in the pencil button to edit the Campaign.
- Apply any changes in the fields that are explained further in Create a process and click on Save or Save and Notify depending on whether you would like simply to save or send a Notification message as well while applying changes.
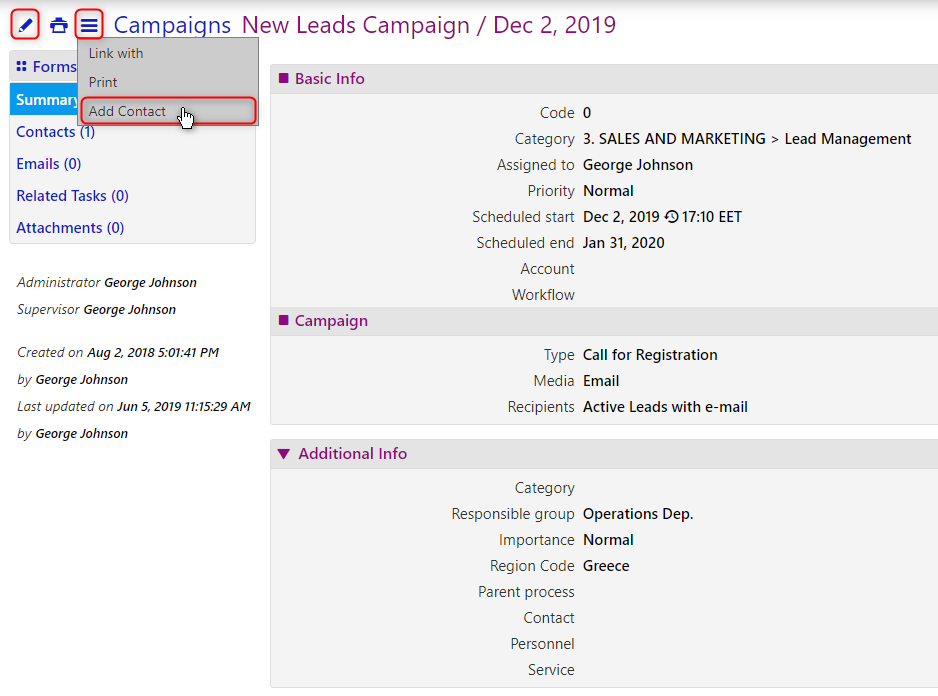
- Click on the Actions button to open a list of actions.
- Select Link with to Link the Campaign with any Comidor entity (other processes, account, contact, project, opportunity, etc.). A pop-up window appears.
- Click on Add Contact to add manually more recipients on the Campaign recipients list.
- A new pop-up window opens where you can select the Contact, Status of the Contact, Last Contact Result and Contact Date. Click on Save to proceed.
- Click on Print whether you need to print the current view of the campaign. A new tab opens in the web browser. Click on Ctrl+P to Print. (Changes may apply in different browsers)
- Also, you can change the Campaign state simply by clicking on the state button on the top right. Then select the state of the Campaign.
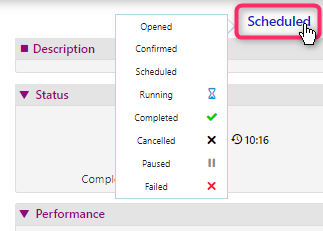
- Select Scheduled in order to set that it is almost certain that the scheduled time will be the start time of this Campaign, too. A new pop-up window appears, where you can now set a different start time and date or take as granted the suggested time and date. Click on Save.
- Select Running and a new window appears, where the user can set the execution time and then, the Campaign state will be updated.
- Select Paused in order to pause a Campaign for some time. A new pop-up window appears and the user can put the duration in hours so far and % of completion. Also, can update start and end dates and times, too.
- Click on Failed on a process that failed to be completed, update start and end dates and times, duration and quantity and click on Save. See the update in Process execution information.
- Click on Canceled on a process that has been canceled, update start and end dates and times, % of completion, duration, and quantity and click on Save. See the update in Process execution information.
- At last, click on Completed to set a process as complete. Update start and end dates and times, % of completion, duration and quantity and click on Save. See the update in Process execution information.
Add Tasks & Files in a Campaign
Tasks setting is necessary to schedule work that should be performed by multiple people and groups. Add a quick Task by clicking on the ‘+’, being in the Related Tasks tab.
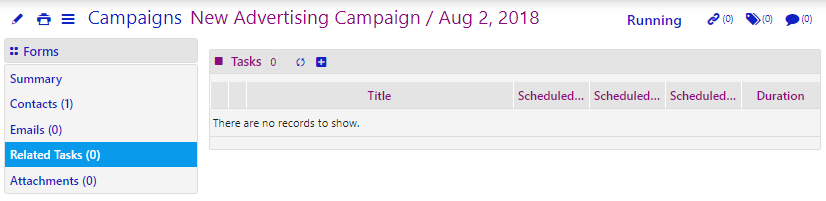
 A new form opens. At this point, you can create multiple Tasks, enter and monitor them from this point. Click on the refresh button, in order to instantly see all new-added tasks in the form.
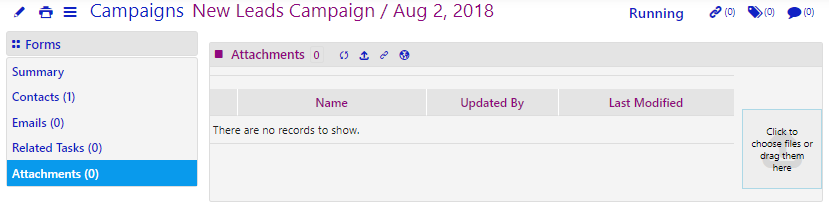
Also, you can easily upload related files straight from your Desktop or by clicking on to attach a File URL. Click on an already uploaded file to Open it (downloading and previewing of current and previous versions are available), Rename it or Delete it.
Discuss below a Campaign
Users that have the right to view a Campaign can also read any discussion that occurs inside that Issue in Notes.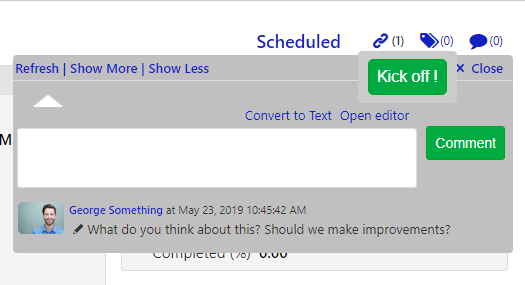
- Simply add a Comment using a simple or enriched HTML Editor (Open editor).
- Users can click on Refresh to see new comments; click on Show More or Show Less to see the number of comments they wish.
- Only people and people in groups that are added in the “Send Notification to” field receive notifications in the Notifications Bar about these comments.
Start a Campaign
- Select Contacts from the side-box. All Contacts that are added through Campaign creation with that filter and any more added manually from the user will be displayed here.
- Use Data Management filters and search box to find any Contact you wish.
- Make sure that all the Contacts you wish are on this list. Eliminate any Contact you don’t want in the Campaign, by multi-checking and then, click on Delete.
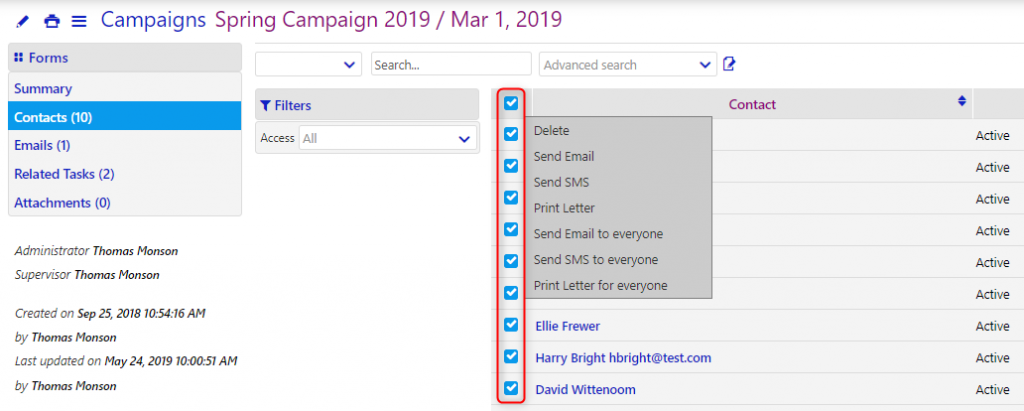
- In order to send Email to some of them click on Send Email, but if you want to Send Email to everyone, go for that choice. By clicking on these options, a pop-up window appears. You can View the recipients of this message, in case they do have an email. Also, complete the Name of the sender, select the Email account (From) who will send the messages. Furthermore, use the Campaign Template you have created, put the Subject, add Attachments and Send. You can also Save as Template the message from this point or Cancel the procedure.
- Also, to send Letter to some of them click on Send Letter or to everyone by clicking on Send Letter to everyone. A pop-up window appears you can write the letter and click on Send. Learn more about HTML Editor.
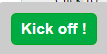
- Otherwise, you can start the Campaign by clicking on the Kick-Off! Button which is displayed in the right bottom of the screen when an already created Campaign is viewed. Select the Summary from the side-box to see this button.
- A pop-up window appears. This includes all the Contacts’ emails that you have added in the Campaign’s selected filter, provided that each recipient’s email is available.
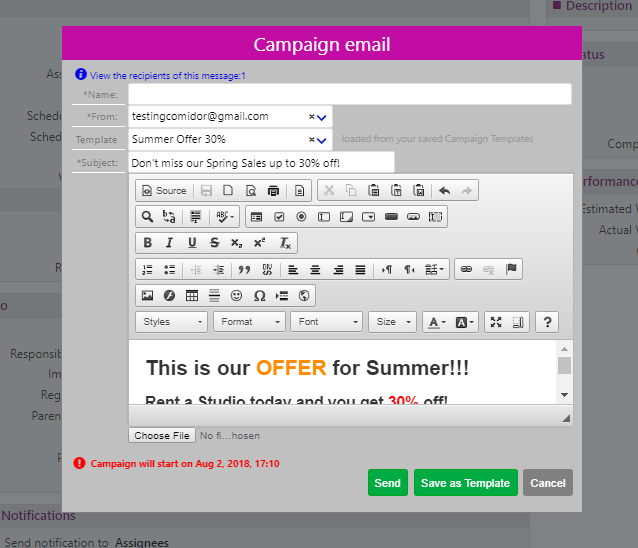
- Click to final check and View the recipients of this Message, enter Sender Displayed Name, select an email to send the emails From, load Template put a Subject and attach a file, if needed. Click on Send after making sure that Campaign will be sent in the proper day and hour. Alternatively, you can Save it as Template.
- A pop-up window appears. This includes all the Contacts’ emails that you have added in the Campaign’s selected filter, provided that each recipient’s email is available.
Evaluate Results of the Campaign
In order to access Campaign Templates, go to Modules Menu Icon > Customer Relations > Campaigns.
- Firstly, from the list view check the Success Ratio of the Campaign. That means the percentage of people opened the email campaign.
- Enter the Campaign. Select Emails from the side box on the left to see all the Emails that received Campaign Message. Check Status (Pending, Sent) and the Number of Views (how many times the recipient opened the message).
- By clicking on each Email entity, you can add Title and Memo on a specific Date and Time.
- Add or view these Titles and Memos by clicking on Contacts from the side-box and then click on that Contact entity. You can Edit (Blue Pencil button) or Delete or Add and Save information at any time. Click on the Black Pencil Button to edit Contact Result details.
- Change Contact Status (Active, Running, Notified, Unknown) accordingly, write down the Last Contact Result and Date and Remarks.
- See the changes applied.
Manage Campaigns massively
- In order to access Campaigns, go to: Modules Menu Icon > Customer Relations > Campaigns. A new Unit Action Tab appears with the name Campaigns in the Active Units Bar.
- Users can see all Campaigns in a ListView. Navigate to other views, sort or filter the Campaigns in order to find the one you wish. Check Data Management options for more information about all these.
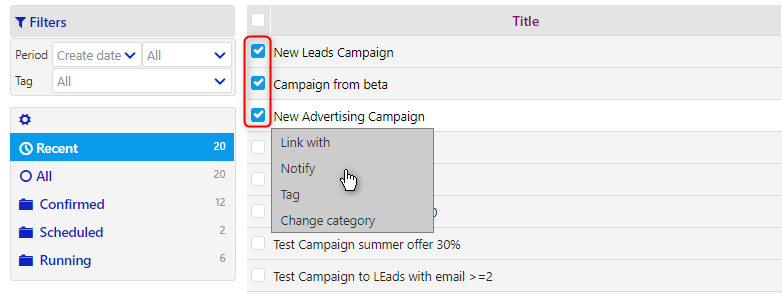
- Check multiple Campaigns from the list in order to Link them with other Comidor Objects (such as Projects, Opportunities, Files, etc.) or Change them Category (This refers to Category set when Creating a Campaign).
- Click on the Actions button to Export or Print the viewing list or all the Campaigns.